HEADS UP - All physical product shipping is on hold until mid-June!

I'm so excited to make this quilt and share my tips with you along the way.
Here's how it's going to work: each Monday for the next 7 weeks, I'll share a blog post with the weekly focus and any tips, tricks, or tutorials for the week. Each blog post will be linked to the Hurrication QAL page (bookmark this page!). I will also send an email with a link to the blog post and the giveaway winner. Plus I will share it on my social media, so you don't miss anything!
If you are on Instagram, share your progress using the hashtag #hurricationQAL and #hurricationquilt so I can see and cheer you on! Be aware, your account must be public for me to see it.
First things first, if you don't have the pattern already, you can download the PDF here, the PRINTED version here, and download the free alternate version here.
Before we jump in, let me introduce myself really quick! My name in Julie and I am the pattern designer behind Running Stitch Quilts. I started quilting in 2014 when I bought a sewing machine on a whim and I haven't looked back since. My husband is in the military and we have lived all over, but we are currently in Michigan with our two daughters and two dogs. When I'm not quilting or wrangling kids, I'm probably running. So far, I've done one marathon and five half marathons with another coming up in October!
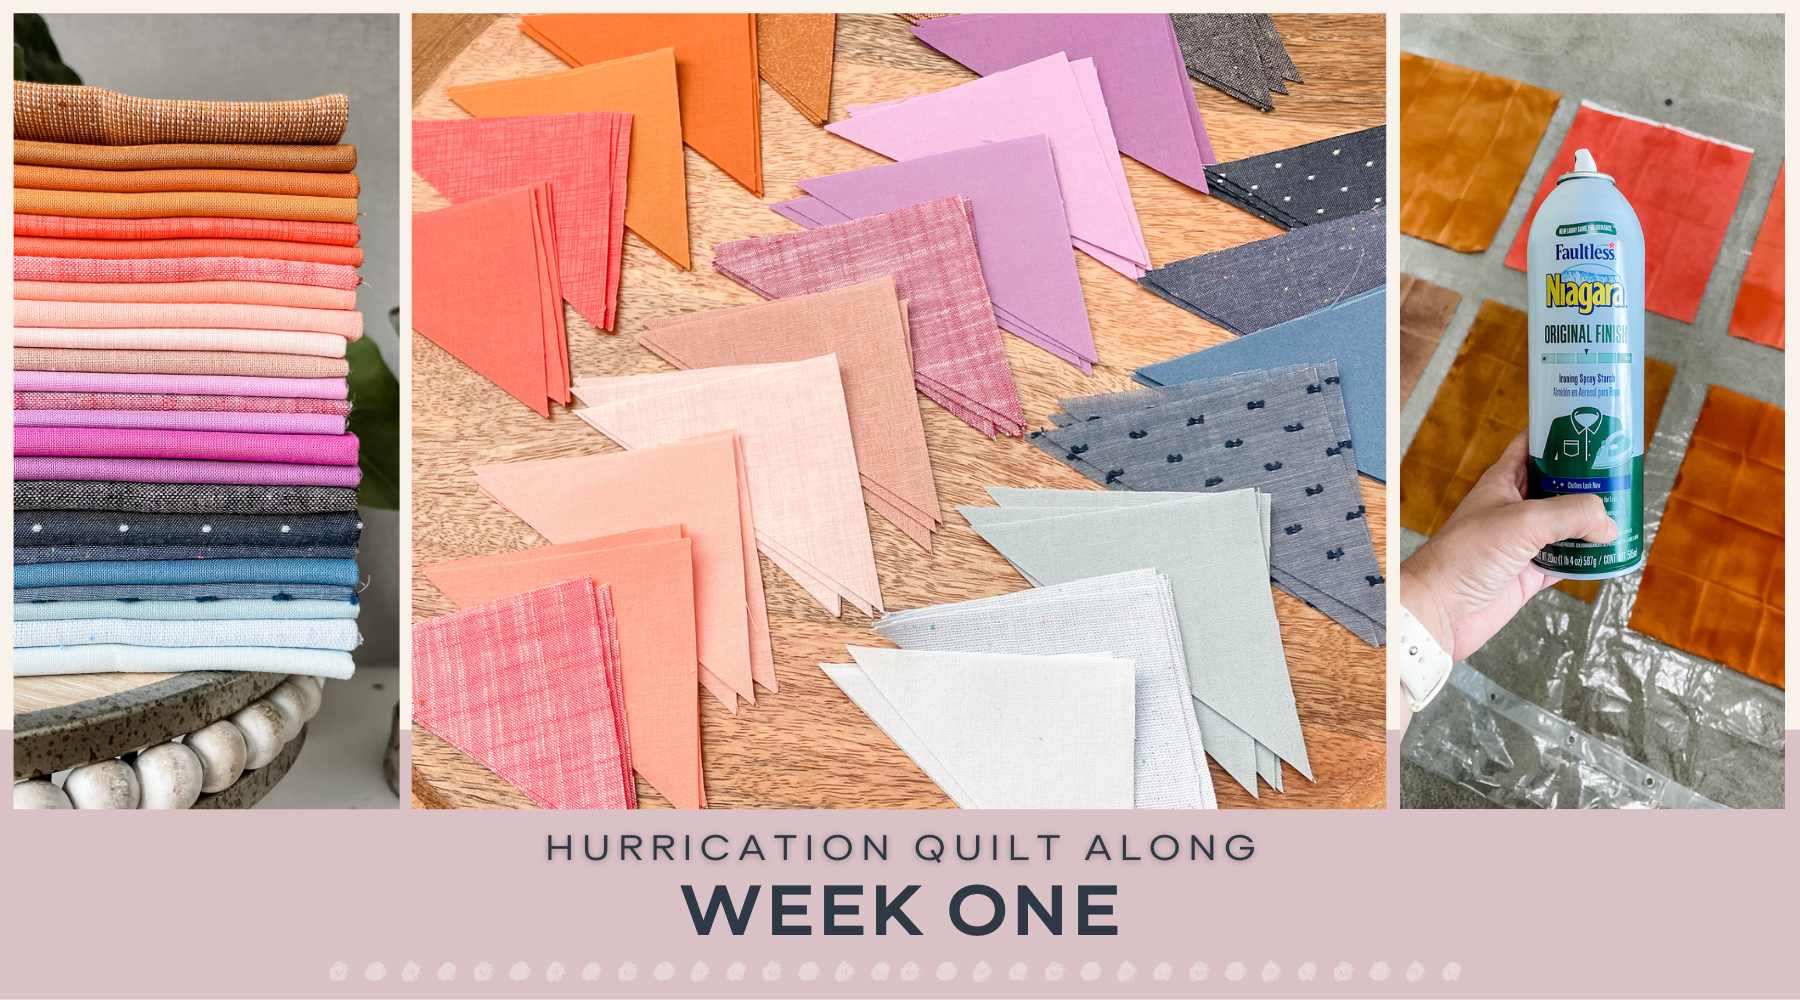
This week we will be focusing on choosing, prepping and cutting fabric, and getting organized.
You have a lot of options with this quilt. It can be made with yardage, half yards, or fat quarters. In addition to that, I made an alternate version that has slightly different fabric requirements. You can get more information on that here.

No matter which version of the quilt you make, the key is staying organized. To help you with that, I've linked the coloring page here. Print off as many as you need to plan your quilt!
If you are making the Modern Solids version, it can be helpful to make a swatch card to keep by your sewing machine for easy reference! Glue, tape, or stitch down your fabric in the desired placement. It is a great visual cue when sewing.

If you are making the scrappy or ombre versions, I talk more about how I keep those layouts organized below. For now, make sure you get your pieces mixed and matched or laid out in an ombre pattern.
Starching your fabric is not required if you want to skip this step. However, I like starching my fabrics because I think the stiffer fabric is easier to sew with and helps with accuracy. I like it for this pattern in particular because of the bias edges in the pattern. Bias edges are prone to stretching and distortion, so you'll need to handle them with care, but starched fabrics can help with that a bit. I have a blog post where I talk more about bias edges.

If you want to starch your fabric, do it this week, BEFORE you cut into it. Starch can cause a small bit of fabric shrinkage, so if you spray down fabric that has already been cut, you run the risk of trying to sew with pieces that are too small.
I shake out my fabric and then spray it down pretty good. I let it dry a bit, then iron out any wrinkles and creases. If I'm not cutting into it right away, I will drape it over the back of a chair to minimize putting creases back into it.
Cutting for this quilt is fairly straight forward. Please make sure you are following the correct chart and read through all of the instructions before starting!
TIP: Use a fresh rotary cutter blade (your hands and wrist will thank you!), and measure twice and cut once. ;)
If you are making the alternate version from the pattern extension: You will need to refer to the original pattern for B, C, and E1 cutting instructions. Please let me know if you have any questions!
For ALL versions: Don't forget to cut the appropriate pieces diagonally into triangles. Refer to your pattern or pattern extension for specifics.
When you are finished cutting, plan the scrappy or ombre layout.
TIP: If you are making a scrappy quilt, you need four different fabrics per block. When mixing and matching (or planning the ombre) only work with the small A triangles. This way you aren't handling the bigger triangles more than necessary.

This is how I planned the ombre layout for my quilt!
If you are wanting to make the ombre scrappy version, this blog post goes into more detail about how I planned that quilt. It also has a color key you can refer to that can get you started. Depending on your fabric, you will probably need to make some tweaks, but it is a good starting place!

Each week I will be giving away a FQ bundle curated from my own stash! Here is this weeks bundle!

To enter in the giveaway:
– Share your progress on instagram using the hashtag #hurricationqal and #rsqpatterns. (Your Instagram account must be public or I won't be able to see it.)
– Because I want this to be a stress-free QAL, any picture of your progress counts! It doesn't have to necessarily “match” the prompt. If you don't have your fabrics yet, post the QAL graphic. If you have your fabrics, show them off so we can see what you're going to make! If you want to post more than once, go for it! All of it counts. :)
I will randomly pick one winner on Sunday night and announce it in next weeks email newsletter and in my IG stories!
Jill of J. Coterie is giving away free long arming services (up to $250) and Rachel of Saltwater Fabrics is giving away a $50 gift card to her shop!
We are jumping right into block assembly next week. I'll be sharing my tips for chain piecing and trimming the blocks at each step.
If you have any questions, drop them in the comment box below!
See you next Monday!